


I need to start this guide off with a few disclaimers: I do work for NVIDIA. And while I’m a decent enough wireless engineer, I’m certainly not an expert on exactly how our embedded products work (but I do know where those experts sit). This is also not a sponsored post – I paid for all of the hardware involved except for the NIC (we don’t get a discount – no free 2080Tis for anyone). But I honestly think the Nano is a great little maker board and this has been a really fun project.
Also, this was certainly a team effort with my friend Robert Boardman. Disclaimers for him: He works for Mist. No, Mist didn’t sponsor this. No, Robert will not buy you a 3D printer. (I already asked, he’s got quite a few of them.) For my Cisco friends who are likely reading this: Relax, we’re just friends.
I know that some of us right now have 802.11ax-capable APs (we’ll leave ‘Wi-Fi 6’ for another day). But having APs with no clients isn’t fun, and for testing (and fun) having a real AX client or two is awesome. If you get two of them you have a chance of seeing OFDMA over the air.
At the moment you can get the Galaxy S10, which is pretty expensive, or you can get an AX200 from Intel and stick it in a laptop. That’s also a thing. But when I saw how the Jetson Nano has an M.2 slot it got me thinking. The 8265 works well with it but we wondered about getting the AX200 to work. Turns out it was pretty easy.
Here’s the bare minimum of what you need.
NVIDIA Jetson Nano
Intel AX200 NIC
MicroSD Card – bigger than you need, but it was on sale
Power supply
Antennas
Bag of jumpers (You really only need one, but no one sells 1).
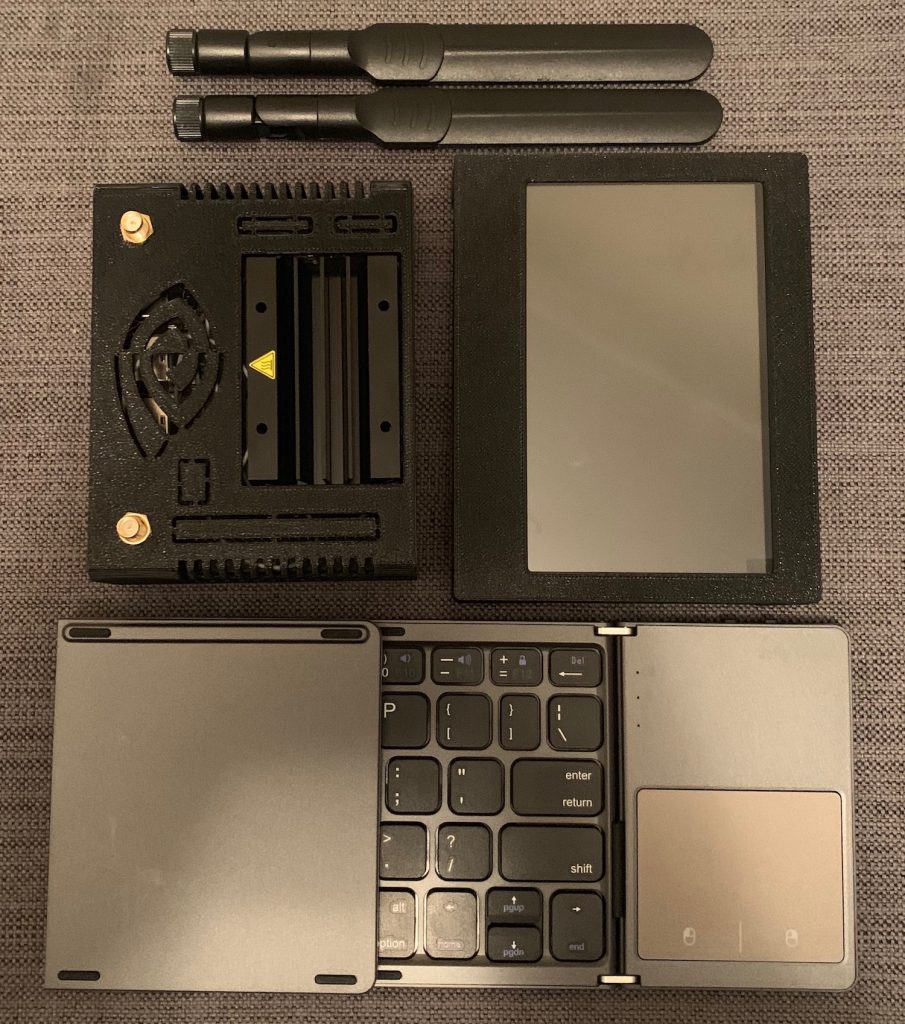
Now we think that list is just the bare minimum. Since our goal was to create a portable AX200 client/sniffer we wanted to have input/output solutions so we also recommend:
Folding keyboard with trackpad
5″ capacitive touchscreen
Without the keyboard and monitor the BOM is at $185.45. With the keyboard and monitor it’s $265.43. All prices are without tax and shipping.
Getting Started
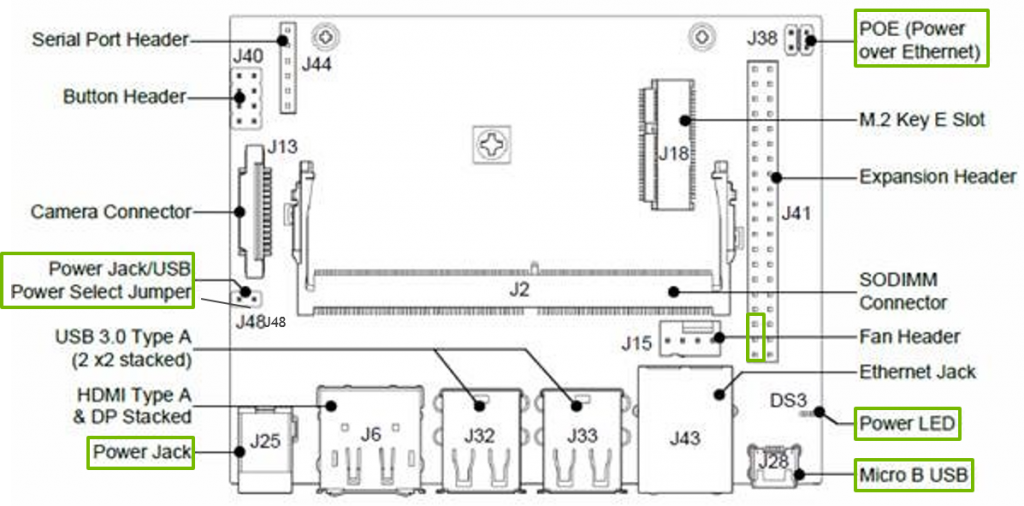
The Jetson Nano can be powered by a 5V 2A USB power supply, but we used the 5V 4A barrel jack option. The reason that the jumper bag is on the list is that you do need to connect jumper J48 for the DC power input to work. So first thing, bridge the J48 jumper. It’s on the left side of this diagram towards the middle, below the camera connector:
If you go through the official NVIDIA getting started guide, you’ll note that the Nano can be powered by USB. However, in the testing that Robert and I did, the Nano is much happier when being used as a desktop if it has full power. You can find a discussion about the usage of DC power here. Also, with the DC power option we were able to plug the USB of the monitor into the Nano to get power – powering the Nano via USB the monitor was unhappy. As a side bonus, powering the monitor from the Nano makes it a touchscreen. And it eliminates the need for two plugs.
Next, you’re going to want to prepare the SD Card. Download the image and use Etcher to write it to the SD card. If you’ve never done it before NVIDIA has pretty good instructions on how to do it for folks on Linux, Mac, and Windows.
Now it’s time to install the AX200. This is best explained via video and I think this one does a pretty good job. As Wi-Fi engineers we all know that the antenna connectors are a challenge. The antennas are from NVIDIA’s open source robot Kaya, but the 35cm cables are a bit long. I’m on the lookout for an antenna package with a shorter cable option.
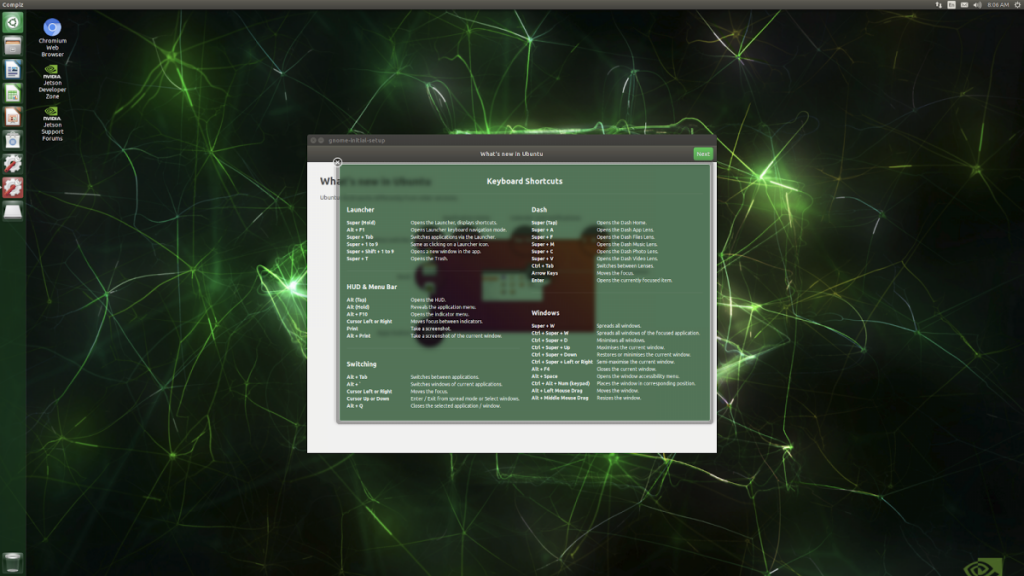
Now you’re ready to boot everything up! Connect the USB from your keyboard/mouse to the USB ports, connect the HDMI and USB to the monitor, wired ethernet, and power. Next thing you know you’ll should be at this screen:
Wi-Fi Drivers
Now that you’ve logged in you will probably note that there’s no sign that the Nano sees the AX200. What you’ll want to do is to build the core45 release of the iwlwifi driver that you can find here. Here are the commands:
git clone --single-branch --branch release/core45 https://git.kernel.org/pub/scm/linux/kernel/git/iwlwifi/backport-iwlwifi.git
cd backport-iwlwifi/
make defconfig-iwlwifi-public
sed -i 's/CPTCFG_IWLMVM_VENDOR_CMDS=y/# CPTCFG_IWLMVM_VENDOR_CMDS is not set/' .config
make -j4
sudo make install
Now that the iwlwifi driver is up to date and installed, it’s a good idea to install the latest firmware for the ax200.
git clone https://git.kernel.org/pub/scm/linux/kernel/git/iwlwifi/linux-firmware.git --branch iwlwifi-fw-2019-07-20 --single-branch
cd linux-firmware/
sudo cp iwlwifi-cc-a0-48.ucode /lib/firmware
Once both the driver and the firmware are installed then reboot the Nano and you should be up and running.
Just in case…
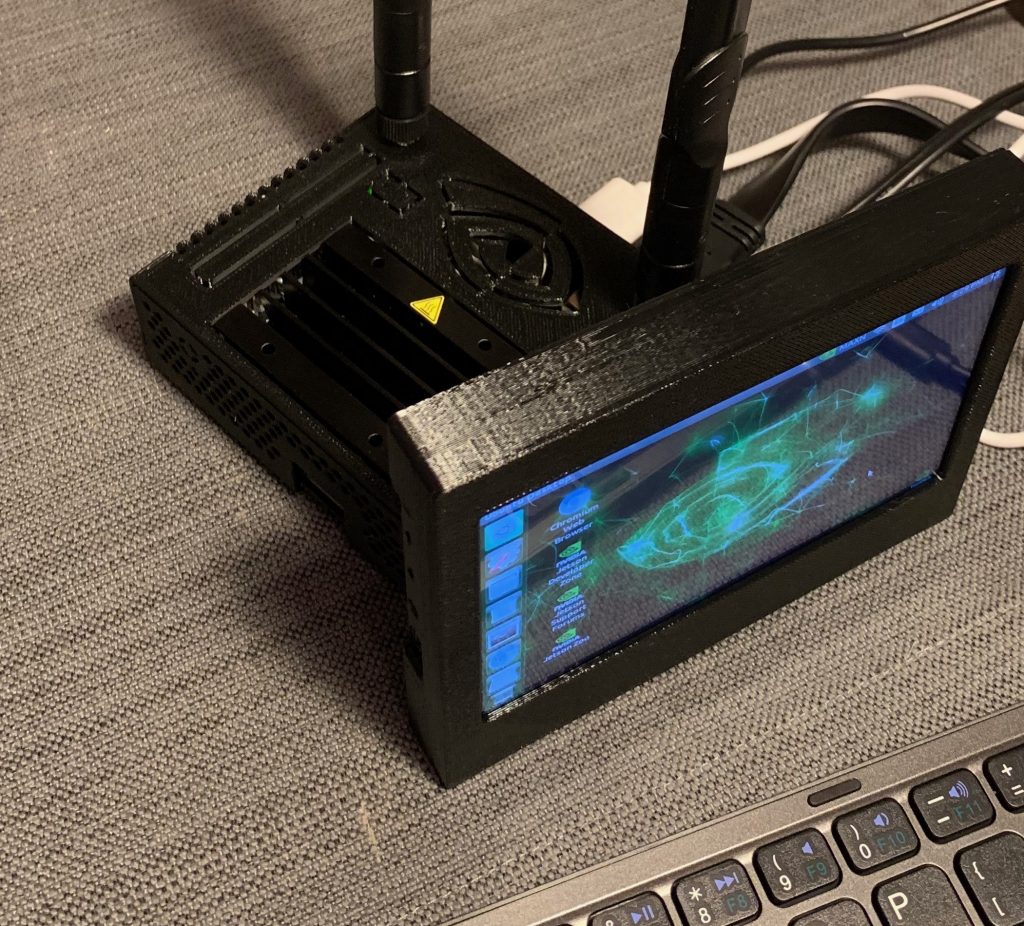
This is all great, but you have to admit that it’s a bit unwieldy. If you happen to be able to do 3d printing (or, in my case, know a master 3d printer such as Robert) there are some nice case options for both the Nano and that monitor. We are currently using this case for the Jetson Nano (note: Don’t try to use the antenna holes on the panel with all the connectors – it will block the DC jack). Robert also printed this case for the monitor and it’s pretty nice. He has some interesting ideas on how to perhaps modify these designs to make things a bit more functional.
Do you even ax bro?
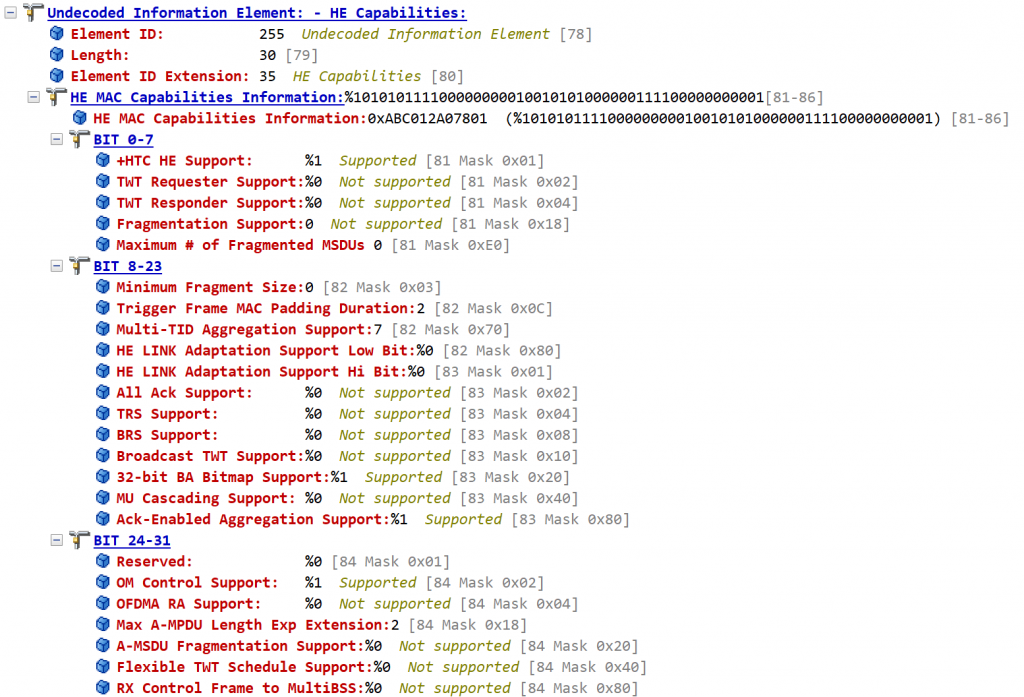
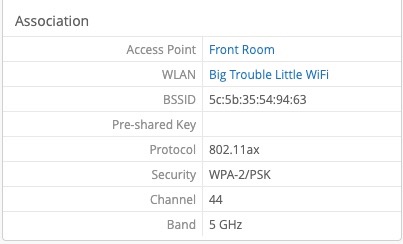
Why yes. Yes we do.
So what now?
At this point we have an 802.11ax client for around $200 (give or take). Up next:
- Taking packet captures from the CLI and Wireshark
- Performance testing using iperf3 and IxChariot
- General ax hacking
What would you like to see? Feel free to leave a comment below.